Emily Briody
Kylemore College, Co Dublin
5th Year Puppetry
-
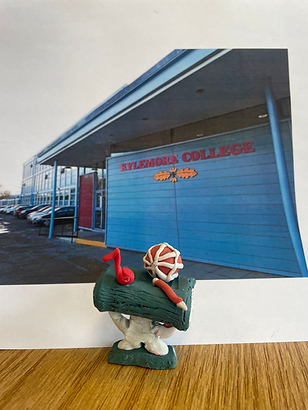
All of the students got to start their clay head, they all look individual, meaning they didn't just copy my example of the pp
-
The students made sure to knead their clay very well, some of the students even asked me if they had to knead the small amounts of clay I gave them, which means they understood very well and were even saying how they don't want their clay to explode in the kiln
-
A lot of the students had an idea before they came into class of what character they are aiming for. Some had their ideas drawn in their notebooks.
-
The students all completed the process of preparing their heads for the kiln, splitting the head in half, scooping 2 holes, slip and scoring and wrapping a coil around the head to secure it. I was happy with my slide on the board of my process. The students could follow the basic steps.
-
I helped a student who was slow at making the face, move onto the next step (splitting the head in two and scooping out the holes) so that she could catch up with the rest of her classmates.
-
The students are all at the same stage, painting their clay heads, this meant that I could teach the students all at the same time
-
For most of the students who are using skin colour in their clay heads, they got to see a demo by me, which meant that they now know how to make the colour.
-
I started off by showing the students a study of the measurements I went by and the fabric cut outs to give the students an idea of what they are going to do for the majority of the class
-
I also had sheets prepared of the measurements of dresses/trousers/skirts etc to give all students an option of what way they may want to dress their puppets
-
I gave the students examples of embroidery that I did throughout the years so that they could add in some embroidery to their puppets for extra detail. The students were in awe of it and it encouraged them to do it
-
I asked the students before they started choosing colours, what colours would match their puppet, just so I know they are good at choosing colours, thinking of the rhythm
-
I could bring Home-economics to the class, teaching the students how to use a sewing machine, how to set one up, changing the stitches etc, then the students who didn't do home ec learned for the first time
-
I started to see an awful lot of the students helping their peers and getting on with what they had to do, I would assist any student who was struggling.


1st Year Lino Printing
-
I emphasised each step (drawing technique) plenty of times so that the students could understand what it is they need to do, therefore each student did what I had to say
-
I felt this was a great way for the students to loosen up their drawing skills
-
There was a nice use of colour going on in their page as they had to overlap their drawings on top of eachother (layering).
-
The class all got to make a viewfinder, they already knew how to make one from before
-
Folding up the sheet into 8 sections was a good idea to get the students to do their thumbnails, this saved so much time from having to take out rulers and pencils
-
Most of the students completed all 8 thumbnails, which meant that we could move onto the next step, even if some of the students didn't get completing all 8, they can still choose one thumbnail from the mix to draw bigger next time
-
I emphasised to the students how I want them all to fill up the whole thumbnail square hence my visual aid on the board, therefore some of the students started to flip the page and learn from where they went wrong
-
The students really enjoyed this task as they focused on one drawing instead and didn’t feel the pressure to create multiple of drawings
-
The students worked on pattern to fill up the negative space although there was no pattern in their thumbnails, just to add more to the composition, since it is much bigger than the thumbnail
-
I was able to give the students who were missing during the last class, the next step they need to do, therefore all of the students were busy
-
I went over to each student one to one to make sure that they are all on the right track, I gave each of the students ways to reveal their drawing on their lino block, drawing a lot harder onto the tracing paper side when on top of the lino.
-
The class had a much better idea of what their lino composition should look like from looking at some of my lino techniques that they can incorporate into their final design
-
Most of the class got to complete their final design which means that I can start the next step of the process with the whole class as they will all be at the same step
-
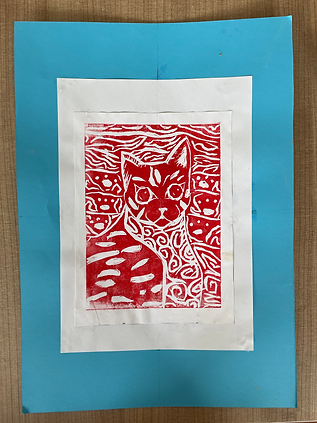
I demonstrated health and safety, while using the visualiser to get the students to know how they should cut into lino, students repeated after me “always cut away from your hands”.
-
I wanted to give the students time to cut, I didn’t want to rush them into any printing today, just focus on the lino techniques and patterns
-
I was happy with the demo, since the visualiser wouldn’t work because the computer wouldn’t start, I had to get all the students to gather around beside me so that they can all see what I am doing
-
I asked the students plenty of questions such as what am I printing the colour onto, the part that I haven’t cut into which is? I was happy when a student said ‘positive space’.
-
I had a poster stuck to the board of my prints based on practice rounds to give students an idea of what their print will look like when they have finished printing. This poster also emphasises positive and negative space
-
I felt really good about myself when some of the students expressed how much they enjoyed the class saying “I love this!!”.
-
I had a system in place for the students who were printing, inking on one side of the table and printing on the other side, I had a waiting list for the students who were ready to start printing, I couldn’t have too many inking at the one time, I felt I had good control in the classroom.
-
Before students started to print I looked at their block and I knew if some of them needed to add more to it or cut deeper, otherwise it would be a waste of time for the students.
-
The colours of the students prints stood out very well against the colour of their border due to my lesson based around colour theory
-
The student evaluation sheet was a great way for me to know what the students understood during this project. It will give me some pointers for next time
-
Overall, I was very impressed by the work that the students put into this UOL, although it was a long running one, most of the students used their enthusiasm and got plenty out of this project
-
I felt I thought the students skills for life, learning crafty skills such as lino will stand to them throughout the years if they decide to keep on art as a subject


5th Year Visual Studies
-
I asked a few higher order questions at the start of the class such as ‘what does concept mean?’, ‘What does Conceptual mean?’, ‘What does conceptual art mean?’ seeing how much the students already know before I start to discuss the topic.
-
The video worked out well as it kept the students actively listening and engaging as I put the video through edpuzzle which is a great resource for adding questions into the video while the video is playing.
-
The class really enjoyed this topic, we started discussing our favourite filmmakers. It was interesting hearing all of their favourite kinds of films and figuring out their personality.
-
The video clips worked well as it really showed what special effects are and how they are used. I had one for practical and one for digital special effects.
-
It was a good idea to get each student to read a paragraph each, this meant that all the students concentrated in the text while getting them to highlight the important words
-
I was happy to have given each of the students a hand out each, as the computer wasn't working today in the class
-
Before discussing sculpture, I asked all of the students if they know of any sculptures in particular, did they ever make one before just to see what they already know, this is always a good way of settling the class.
-
I thought the plasticine mini sculpture was a great way for the students to understand the meaning is behind sculptures in general, what the sculpture will represent the school by, there should be a meaning behind the work
-
When I started discussing Andy Goldsworthy the whole class were in awe of his work, I was able to describe what he does and how he does it very well
-
The task I gave the students to do at the end was very enjoyable for them and I felt that they will remember Andy Goldsworthy by their making of a landscape piece
-
Recapping on what we did during the last session was a good way of finding out what the students could remember from the last session.
-
Just focussing on artist Herman De Vries worked out well as the students could fully understand the concept behind the work and they wouldn’t get mixed up with other artists who have a similar practice